Corporate Membership Program

By using the corporate (organization) membership program, companies with corporate contracts can make reservations on a dedicated page.
See here for how to add corporate (organization).
⏱ Estimated time: about 30 minutes.
 Difference from Individual Membership Program
- Allows sales on a closed site for businesses.
- Enables setting corporate discounts and corporate-exclusive plans.
1.Create the Corporate Membership Program
| Open the membership program from the Brand Management Screen. | |
| Click the 'Add' button to create a new membership program. | |
Check the 'Enabled' box for the membership program. Enter the membership program name. If you have multiple corporate clients but the same content, create one. If creating for a specific corporation, enter the corporate name. Since there is only one membership rank, remove rank 2 and 3. | |
| No need to set up the member registration page or My Page. | |
Enable the 'Organization' button to create a closed site where corporate members can log in with their ID and password. | |
| No need to set the Membership ID. | |
| Next, enable the corporate member login button. Open the facility management screen, go to Settings → Widget Settings → Login Display Settings. | |
| Turn on the 'Organization Login Widget' and save. If the 'Organization Login Widget' on/off option is not displayed, first turn on 'Login Display Settings' and press 'Save' to make it appear. | |
| This will add the 'Corporate Login' button to the login button on the room availability search screen (Booking Widget). When clicking 'Corporate Login', it will navigate to the ID and password entry screen. Corporate members can log in by entering their ID and password and make hotel bookings as corporate members. |
2.Register Corporate (Organization)
See here for how to register corporate (organization).
Corporate (Organization) Login Method
Login Benefit: The benefit of corporate login is that corporate users can log in with their corporate ID and password.
By sharing the corporate ID and password, anyone within the organization can log in.
If you want to enhance security, you can restrict login by IP address or URL referrer.
If you want to enhance security, you can restrict login by IP address or URL referrer.
Individual Login After Corporate Login
It is also possible to log in as an individual member after corporate login.
This eliminates the need for entering personal information and provides benefits such as keeping booking history.
This eliminates the need for entering personal information and provides benefits such as keeping booking history.
Click Member Login after logging in with the corporate account. | Member Login | After Member Login |
Corporate Discount Settings

Benefit: Since you can create a discount promotion for existing plans, you don't need to create exclusive plans.
| Open the Brand Management Screen, go to Promotion, and click '+ New Promotion'. | |
| Enable and enter a promotion name like 'Corporate Member Discount'. This promotion name will be displayed above the price. | |
| Select 'Normal Promotion' for the promotion type. | |
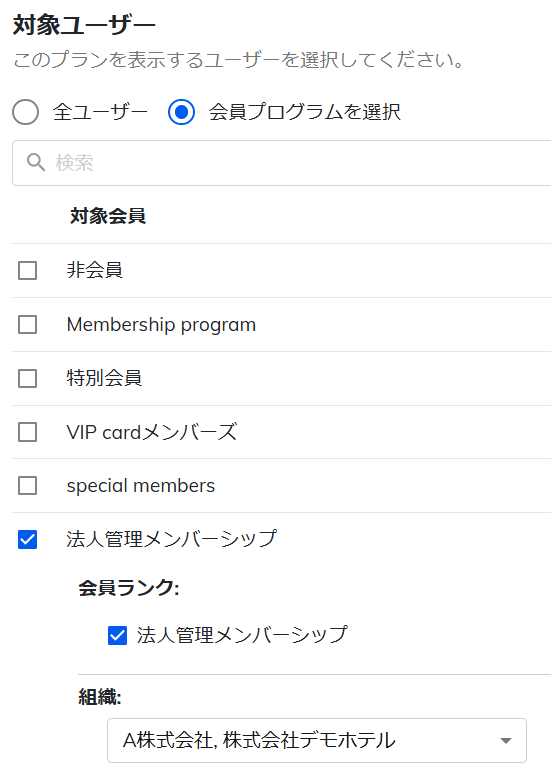
| In the Promotion Application Conditions, select the corporate membership program. | |
| Select all membership ranks and the target organization. You can also set restrictions for the sales period, stay period, and exclusion period. | |
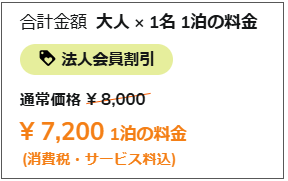
| Set the promotion discount as a percentage or amount. In this example, a 10% discount is applied. | |
| If there is a discount limit, set it here. | |
| Select the target plans. If there are no specific restrictions for each plan, select all plans. | |
| Finally, save and complete. |
Corporate Plan Settings (Optional)
Benefit: If you want to create specific plans that can only be displayed to corporate users logged in with their corporate credentials, select the corporate membership program in the Target User field when creating the plan.
Additional Notes
organization_id
The organization_id is the number displayed after organization/ in the URL when opening the organization edit screen.
It is used when using the parameter.
It is used when using the parameter.
Using URL Referrer for Login
If URL referrer login is enabled in organization settings, login will only be possible if accessed from the registered URL.
To enable URL referrer login, turn it on and save.
For URL parameters:
For URL referrer or IP login:
(ID refers to the organization's organization_id.)
?tripla_booking_widget_open=signInCorporate&organization_id=ID(ID refers to the organization's organization_id.)
Subdomain Usage
If using a subdomain, a new tab will open when launching the login screen, but browser popup blockers may prevent the tab from opening.
To avoid this issue, URL referrer login will now work even when directly specifying the subdomain.
Launch the corporate login screen and obtain the URL.
Add the URL parameter and the ID in the format "organization_id=ID" to the URL.
Note: Use the corporate's organization_id for the ID.
When you set this URL as a link on the referrer URL page registered in the management screen, the Booking Widget will launch and automatically perform the corporate login, even when using a subdomain, without being blocked by a pop-up blocker.
Example:
URL/#/organization-sign-in?organization_id=id
Automatic Login Using URL (Optional)
You can bypass corporate login by using the following parameters to enable automatic login:
| Non-subdomain: | ?tripla_booking_widget_open=signInCorporate&organization_id=XXSubdomain:X |
| Subdomain: | /organization-sign-in?code={hotel_code}&organization_id=XXX |
Differences with URL Referrer Login
With automatic login via URL link, the referrer is not checked. Anyone accessing the URL link will be associated with the corporate (organization).
Setting Up
Select [Add] from the Membership Program section to create a new membership program.
When creating it, do not check the 'Organization Sign-In Settings' (leave it off).
 If using a membership program with 'Organization Sign-In Settings' turned off, the login settings related to this will not be displayed.
Forced Logout Restriction (Optional)
You can set automatic logout after a specified period of inactivity from the last action.
Go to Brand Management Screen → Settings → Organization Settings
| Open Brand Management Screen → Settings → Organization Settings → Feature Settings. | |
Check the Forced Logout Setting and specify the time. Forced Logout Time Set the time (in hours) until the forced logout occurs. In the example above, the user will be automatically logged out 3 hours after their last action. |
Corporate Information Sync
You can sync corporate/organization names from TL Lincoln and Rakuto reservation information.
By default, [Do not sync] is selected. (Even if you do not sync, the corporate name will be displayed in the remarks section.)
Sync Options
If you want to sync, select one of the following options:
All corporate reservations
Only postpaid reservations

It may not be available depending on the PMS. Please check with your PMS provider regarding the corporate code on the PMS.
Additional Items for Corporate (Organization)
By default, only the organization name can be saved for the organization.
To store additional information such as address or phone number, you can register them as [Additional Items].
To store additional information such as address or phone number, you can register them as [Additional Items].
Go to Brand Management Screen → Settings → Organization Settings → Additional Items.
Click [+ Add].
You can choose whether to use the created item. When set to ON, the item will be enabled and available for use. | |
Item Code (Required) This is the code used to identify the item when retrieving data via the API or when bulk data is registered. The code is mandatory to enter, even if it is not used. | |
| Item Name (Required) This is the name of the additional item. |
The additional items set here will be displayed in the individual organization settings screen.
| Additional item | Organization |
Related Articles
Membership Program
Running a membership program at your accommodation allows you to build a loyal fan base, which increases the likelihood of bookings through your official website. It also helps strengthen your brand, encourages repeat usage, and can reduce ...Corporate (Organization) Settings
By creating a corporate membership program and registering the corporate (organization), corporate login will be enabled. For more details about the corporate membership program, please refer to this link. ⏱Estimated time: About 5 minutes. How to ...Point Program
Points are awarded based on members’ hotel reservations. You can also set rank-up conditions according to the number of points held. By utilizing the points program, you can expect to promote direct bookings and increase repeat customers. ⏱Estimated ...Membership Information Registration, Import, and Download
会員情報の登録 会員情報は会員登録画面でお客様ご自身で登録される以外に、管理画面で個別に追加、またはCSV形式でインポートが可能です。 管理画面で個別に追加する方法 ブランド管理画面ー会員ー追加ボタンをクリックします。 追加ページが表示されます。各項目を入力し保存します。会員IDは入力が無くても保存が可能です。 管理画面から会員を追加で登録した場合、お客様には会員登録に関するメールが届きません。 保存しただけの状態では、登録ステータスが「ユーザー未登録」の状態になります。 ...Corporate (Organization) Feature Settings
Here is how to register a corporate organization: From the Brand Management screen, go to [Reservation Engine Settings] → [Organization]. Please configure the settings as shown below. Feature Items and Descriptions Feature Description Maximum Stay ...