Area Settings
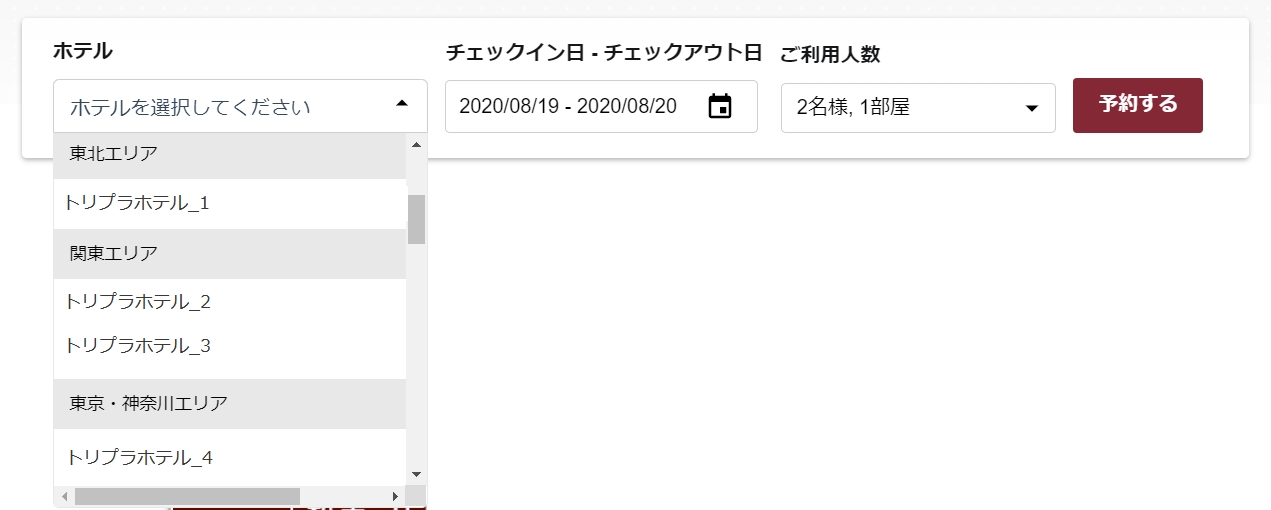
The area setting enables area-based searches using the search bar on the brand top page of a chain hotel.
Note: If you wish to implement this on your brand page, a dedicated account will be issued. Please contact tripla before proceeding with the setup.
How to Configure
From the Brand Management screen, go to [Reservation Engine Settings] → [Area Settings].

If no areas have been set, click **Add Area** to create area names that will be displayed in the search bar.

If areas have already been set, you can create a new one using the button at the top left of the screen.

Set the area name.

Rearranging Area Display Order
You can change the display order of areas by clicking the [Sort] button at the top right of the screen.

Drag the icon ![]() on the left side of the display order, or select Move to Top on the right side to rearrange the order.
on the left side of the display order, or select Move to Top on the right side to rearrange the order.
After adjusting the order, be sure to click the Save button to apply the changes.

Reordering Properties Within an Area
Select the area where you want to reorder the properties.

A list of properties categorized under the selected area will be displayed.
Click the **Sort** button located at the top right of the screen.

Drag the icon ![]() on the left side of the display order, or select Move to Top on the right side to change the order of the properties.
on the left side of the display order, or select Move to Top on the right side to change the order of the properties.
After reordering, be sure to click the Save button to apply the changes.

Linking Areas to Hotels
After adding the area name, go to the management screen of each property.
From the Property Management screen, go to [Settings] → [Widget Settings].

From [Settings], turn on the Brand Property Setting.

From \[Reservation Widget], turn on the Area Search Setting.

From the Property Management screen, go to [Settings] → [Property Information].

The property details page will be displayed.
In the [Area] dropdown menu, you will see the list of areas configured in the Brand Management screen.
Select the area in which you want the property to appear.

Note:
-
Properties without an assigned area will be grouped under “All Areas.”
-
If you use the Area Setting feature, make sure to assign an area to all properties.
Configuring Suggested Properties
Open Suggested Properties from the Brand Management screen.

Check the boxes for the properties you want to display in the area list, then click Save.

Video Guide for Configuration
Related Articles
First-Party Cookie Settings
If you are switching to the iframe-based subdomain, it is recommended to configure the first-party cookie settings before setting up the subdomain. If the subdomain is set up first and the first-party cookie setting is not yet complete, a popup ...Chatbot Widget Settings
You can configure the chatbot’s appearance, name, icon image, and more. ⏱ Estimated time: about 10 minutes Where to configure In the facility management screen, go to Settings → Widget Settings → open the Chatbot Widget. You can configure various ...Default Search Condition Settings
You can configure the default settings for the search window that appears when a guest initiates a reservation search. You can also choose whether to display only available options or include those that are fully booked. From the Property Management ...Reservation Security Settings
Here is an explanation of how to configure the Reservation Security settings. By default, this setting is turned ON, and the system always validates the bypass token included in the request when a guest accesses, updates, or cancels a reservation. If ...Promotion Email Settings
When this setting is enabled, you can ask non-member guests whether they wish to receive promotional emails. ⏱Estimated time: Approximately 5 minutes. Where to Configure Brand Management Screen → Settings → Reservation Engine → Promotion Email ...